


30 DAYS MONEYBACK GUARANTEE
Verified Secure Purchase in USA
✔ 30 Days Money Back Guaranteed
❤ Trusted United States America
🎉 Get 45% Discount Every Order
✔ 30 Days Money Back Guaranteed
❤ Trusted United States America
🎉 Get 45% Discount Every Order
✔ 30 Days Money Back Guaranteed
❤ Trusted United States America
🎉 Get 45% Discount Every Order
✔ 30 Days Money Back Guaranteed
❤ Trusted United States America
🎉 Get 45% Discount Every Order
✔ 30 Days Money Back Guaranteed
❤ Trusted United States America
🎉 Get 45% Discount Every Order
✔ 30 Days Money Back Guaranteed
❤ Trusted United States America
🎉 Get 45% Discount Every Order
✔ 30 Days Money Back Guaranteed
❤ Trusted United States America
🎉 Get 45% Discount Every Order
✔ 30 Days Money Back Guaranteed
❤ Trusted United States America
🎉 Get 45% Discount Every Order
✔ 30 Days Money Back Guaranteed
❤ Trusted United States America
🎉 Get 45% Discount Every Order
✔ 30 Days Money Back Guaranteed
❤ Trusted United States America
🎉 Get 45% Discount Every Order
✔ 30 Days Money Back Guaranteed
❤ Trusted United States America
🎉 Get 45% Discount Every Order
✔ 30 Days Money Back Guaranteed
❤ Trusted United States America
🎉 Get 45% Discount Every Order
You're $40 away from FREE shipping!
Spend $50 more to get FREE shipping!



⭐ Top Rated Product – Loved by Customers
🔥 Limited Stock – Selling Fast
🎁 Perfect Gift – Ready to Impress
Couldn't load pickup availability
-
Ordered
- - -
Order Ready
- - -
Delivery

Thank you for shopping with us! Below you will find important information about our shipping process.
Order Processing Time
All orders are processed within 1–2 ex 3 business days (excluding weekends and holidays). Once your order has been processed and shipped, you will receive a confirmation email with tracking information.
Thank you for shopping with us! Below you will find important information about our Refund process.
You may request a return within 30 days of receiving your order.
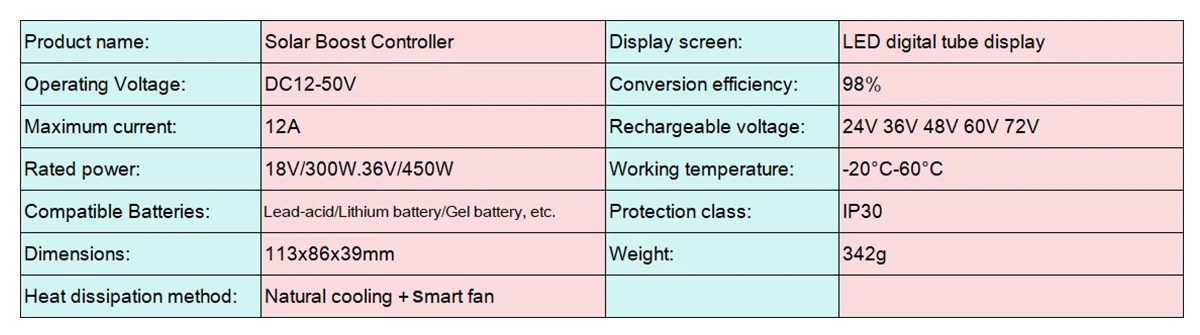
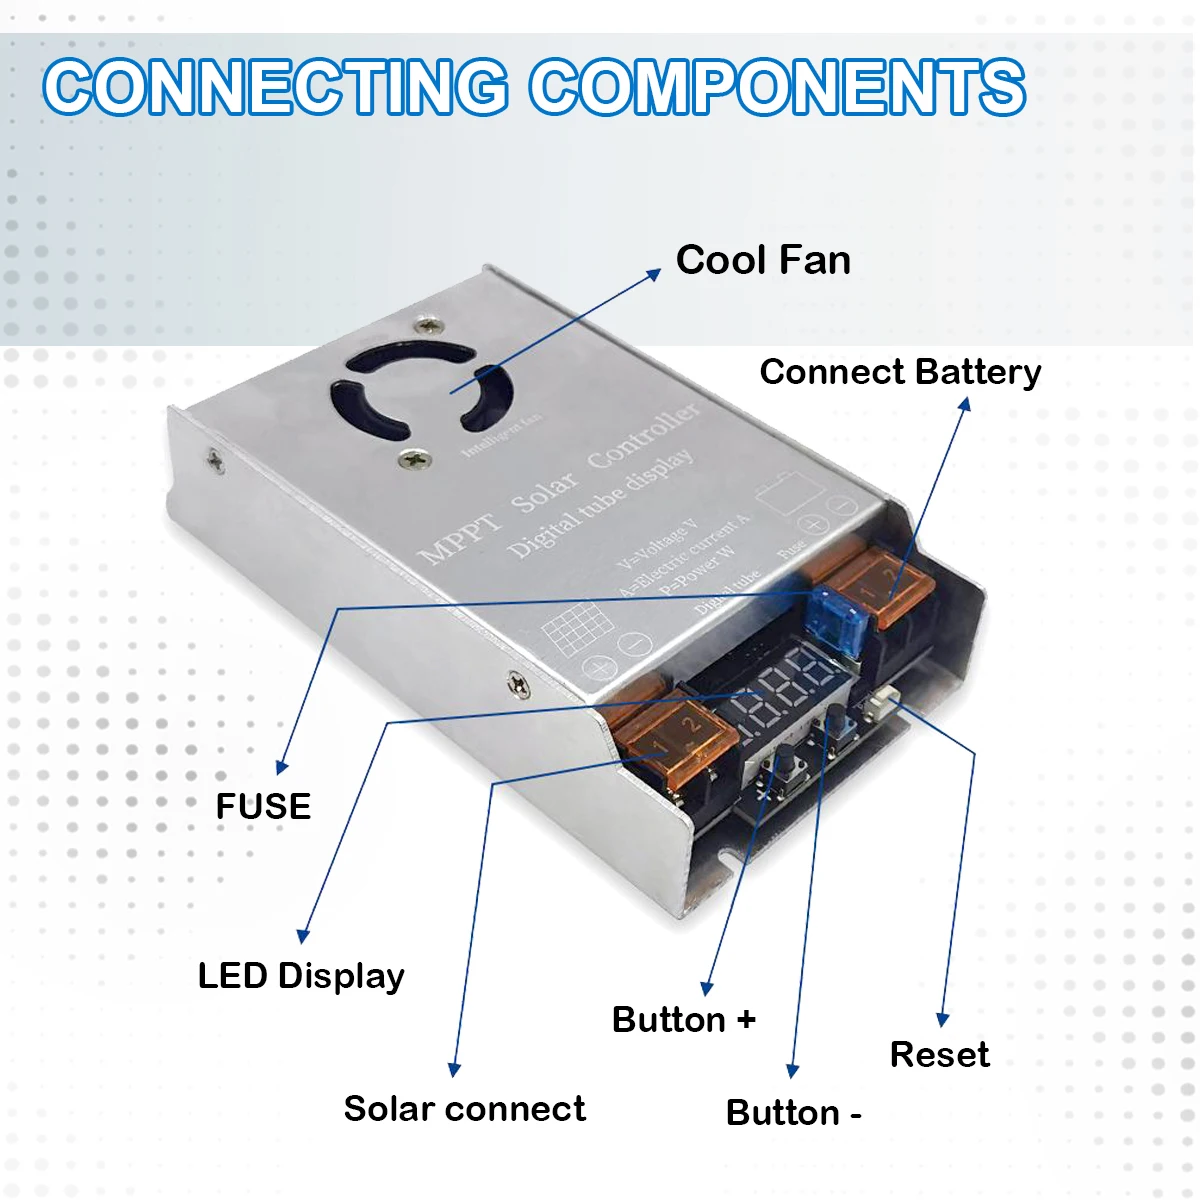
Application: Charger Controller,Voltage Controller,Solar System Controller,Solar Working Station
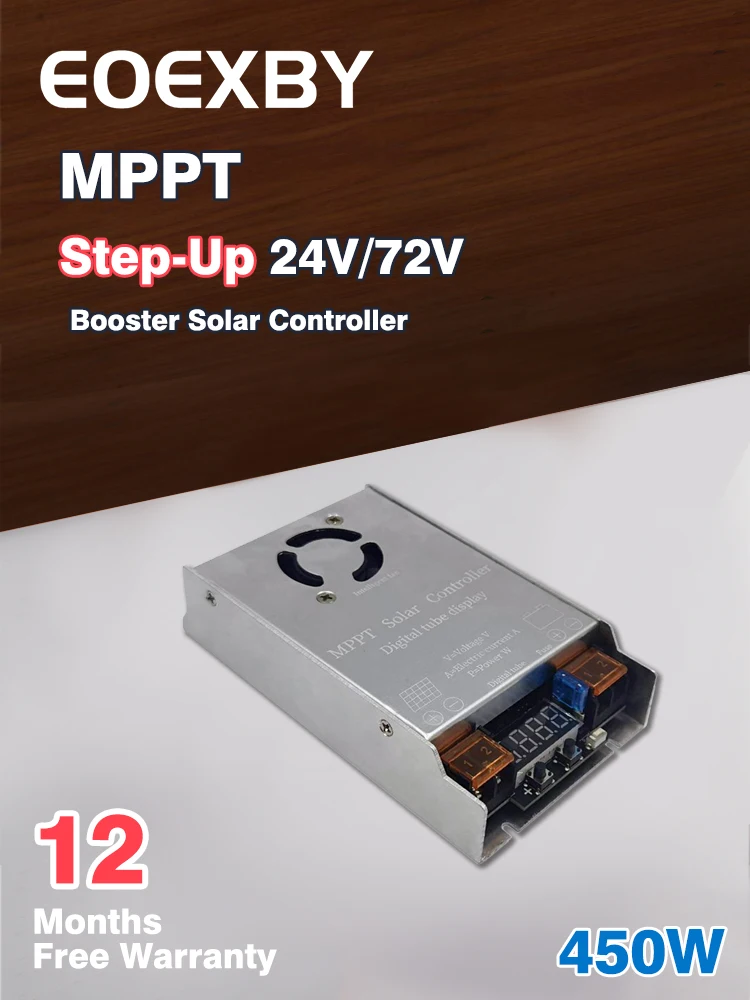
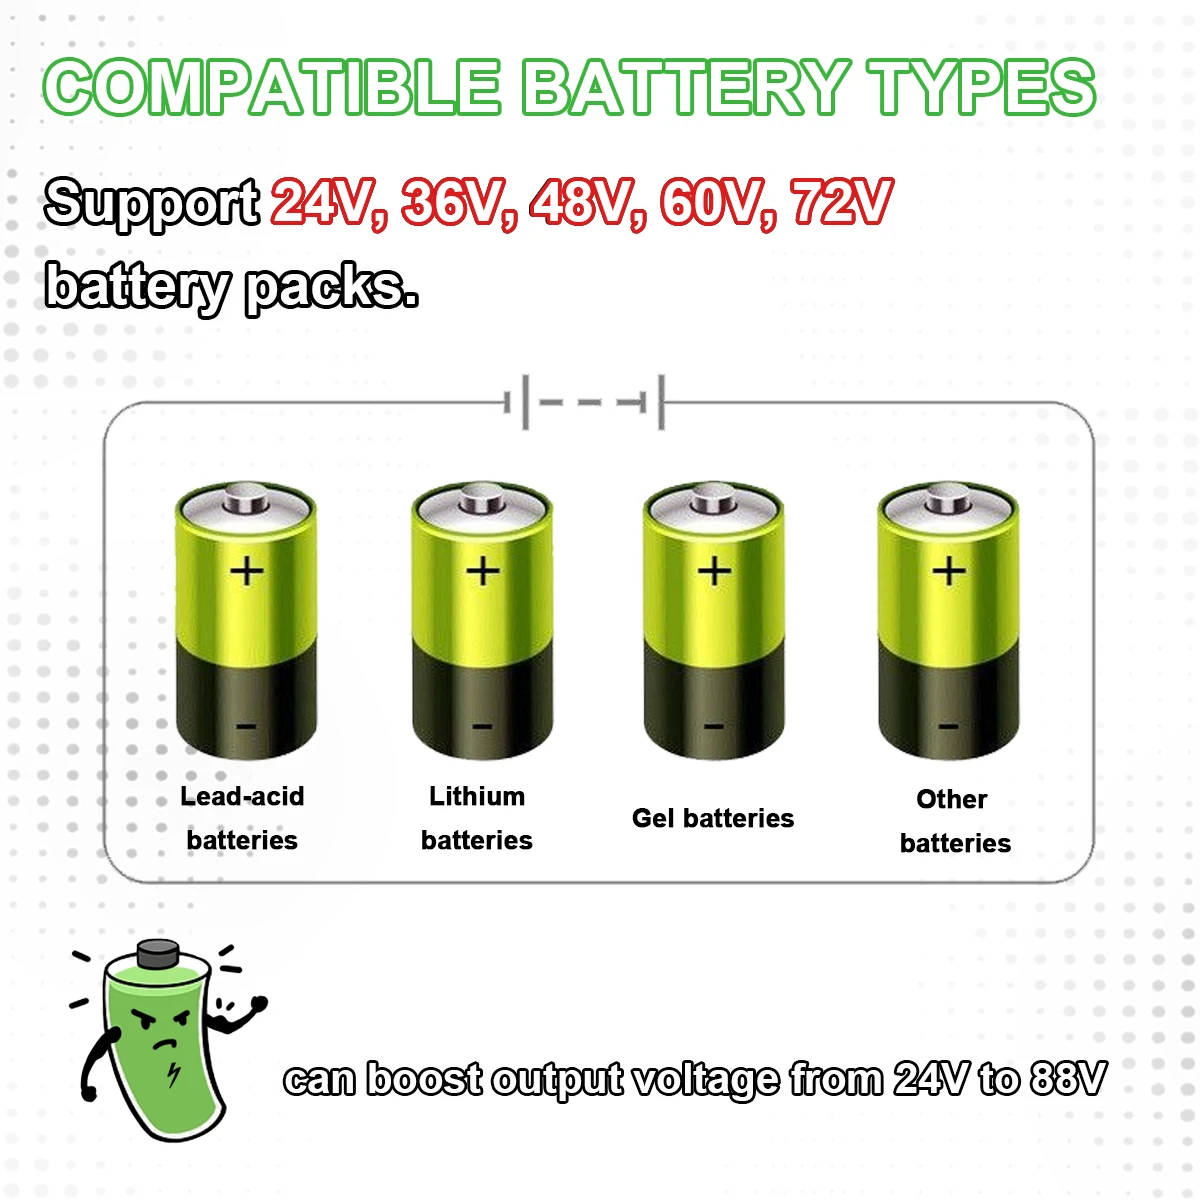
Battery voltage: 24V 36V 48V 60V 72V
Brand Name: EOEXBY
Certification: CE,RoHS
High-concerned chemical: None
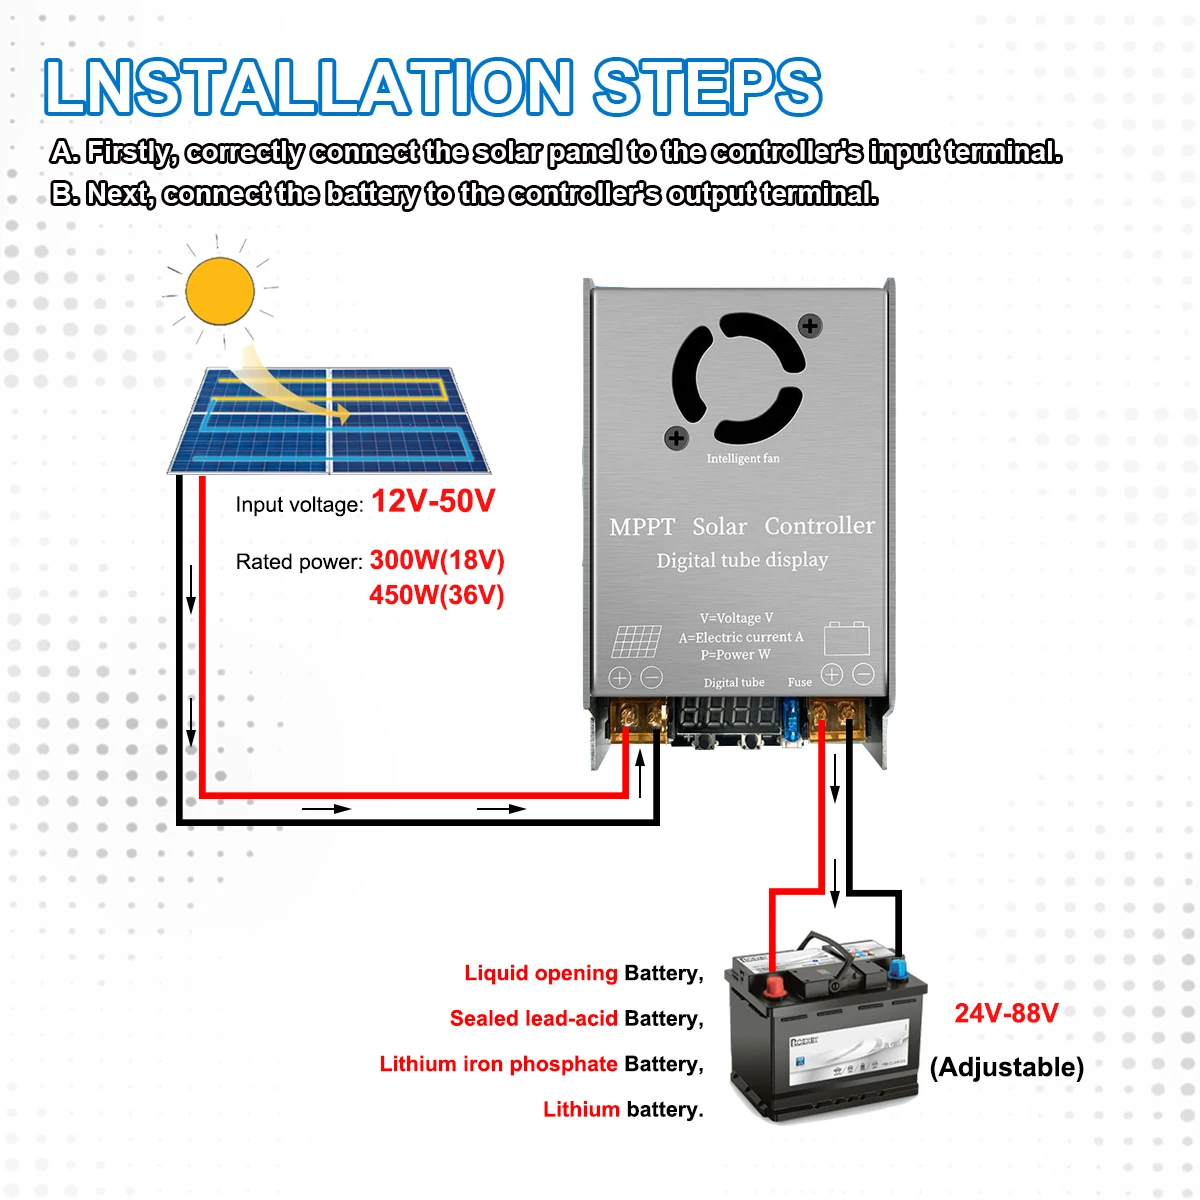
Input Voltage: 12V-50V
Is Smart Device: no
Item: Step-up MPPT Sollar Controller
MPPT tracking efficiency: > 98%
Maximum Current: 12A
Model Number: BT-450W
Net weight: 350G
Operating temperature: -20℃-60℃
Origin: Mainland China
Step-up Ouput Voltage: 24V-88V Adjustable



Verified Secure Purchase in USA
Everything you need to know about shopping with us in the USA.
Curated essentials
Insured delivery
100% Protected
Always here


